Outdoor lighting has many benefits. Properly illuminated outdoor areas deter intruders, reduce the risk of accidents and provide a welcoming ambiance for outdoor activities. However, despite the low maintenance requirements, it still requires some upkeep. Here are some of the ways to keep your outdoor lighting in top shape:
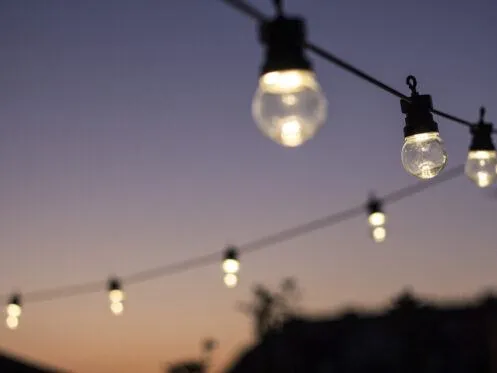
1. Cleaning Outdoor Lighting Fixtures
No matter the type of outdoor lighting fixtures that you install, it’s imperative to clean them regularly. You can start by wiping path lights and spotlights with a damp cloth and a mild detergent, then gently rinse them with water. Clean wall-mounted fixtures in the same way, being careful not to knock loose any mounting hardware. Turn off the electricity to string lights, wipe the bulbs with a damp towel and then plug them back in. Regularly cleaning outdoor lighting fixtures eliminates dust, grime and debris, preventing corrosion and ensuring optimal performance and longevity.
2. Inspecting Bulbs
Remember to switch off the power before checking the bulbs in outdoor lighting fixtures to prevent electric shock. Take extra caution when removing the bulb covers or casings from the fixtures. Look for cracks or blackened spots on each bulb; if necessary, replace them with new ones of the same kind and wattage. Before turning on the light bulbs, make sure they have secure connections. With the power back on, check each light fixture to make sure the bulbs work correctly. Keep in mind that if you are still using incandescent bulbs, this is a great time to consider transitioning to more energy-efficient LED lighting.
3. Trimming Vegetation and Landscaping
The appearance and functionality of upward-facing outdoor lighting depends on keeping the surrounding grass and plants trimmed. The first step is to locate any overgrown vegetation or branches that block the lights. Clear a path for each light by cutting down foliage using pruning shears or a saw. While cutting, take care not to nick any electrical wires or fixtures. Taking time to keep the lights clear of debris, vegetation and landscaping makes them last much longer. It also allows them to provide better illumination.
4. Checking the Wiring
Turning off the power at the breaker is the first step in carefully inspecting the wiring for outdoor lights. Next, check the wiring for damage and make sure all connections are tight. Before you touch any live wires, be sure you have a voltage meter. Get in touch with a licensed electrician if you are uncertain how to proceed or if the job seems too complex. Whether it’s a complicated system or poorly laid-out wiring, they can manage the problem and make sure everyone is safe. Fixing damaged wiring on outdoor lighting fixtures is key to being able to use them safely.
5. Testing Motion Sensors
Motion sensors on outdoor lighting fixtures sometimes stop working. Exposure to harsh weather, corrosion and other factors can damage the sensor components. By walking inside the sensor’s range, you can test the functionality of motion sensors on outdoor lighting fixtures. Equally important is making sure the time and sensitivity parameters are set appropriately on the sensor. If it doesn’t work, make sure nothing blocks the sensor. If problems continue, you may need to contact a professional electrician.
6. Inspecting for Water Damage
When checking outdoor lighting for signs of water damage, it is essential to prioritize safety. Start by visually inspecting the fixtures for any indications of water buildup, such as dampness inside the housing or rust on metal components. If you suspect water seepage, inspect the gaskets and seals for signs of wear and tear. Switch off the power and contact an electrician right away if you find water damage. An electrician will disconnect the impacted fixture from the electrical source before replacing any broken gaskets or seals. To avoid more water damage, the electrician may use silicone caulking to seal the fixture.
7. Adjusting Timers
Make sure the outside lighting timers match your chosen schedule. Examine the timer device for indications of wear and tear or corrosion. Turning the lights on and off by hand is a good way to test the timer. Resetting the timer or, if necessary, replacing the batteries should fix any malfunctions. Seek advice from an expert or refer to the product’s manual if problems continue.
8. Cleaning Solar Panels
Some outdoor lighting fixtures feature solar panels, typically separate from the fixtures or integrated within them. To keep the panels clean and in optimal sunlight-absorbing condition, wipe them down with a moist cloth on a regular basis. Steer clear of any strong chemicals, as they may cause harm. It’s also important to regularly clear the area around the solar charging stations.
9. Getting Rid of Insect Infestations
Ants, spiders and wasps are among the most typical pests seen in Texas outdoor light fixtures. You can fight these infestations by keeping an eye out for nests or webs in your fixtures and removing them as soon as you see them. If you want to keep pests away from your fixtures, spray them with pesticides or use natural repellents. Also, be sure to cover any holes or crevices in the fixtures to keep pests out.
10. Lubricating Moving Parts
Some outdoor lighting fixtures feature moving parts like hinges or adjustable arms for positioning. It’s imperative to regularly lubricate these moving parts with a silicone-based lubricant. You should apply the lubricant to the hinges, pivots and any other movable components according to the manufacturer’s instructions. Wipe away any excess lubricant and debris to prevent buildup. By keeping these moving parts well-lubricated, the lighting fixtures will last longer and work better.
11. Inspecting Mounting Hardware
Switch off the light fixture before examining the mounting hardware of outdoor lighting to avoid electric shock. Check the mounting screws or brackets for looseness, rust and corrosion. Tighten any loose screws and replace deteriorated hardware. If you notice damaged mounting hardware or are unsure about its stability, contact an electrician for assessment and resolution. They can ensure the secure installation and functioning of the fixtures by addressing any mounting concerns promptly.
12. Replacing Batteries
With certain outdoor lighting fixtures, you may have the flexibility and convenience of running them on batteries. To avoid electric shock, turn off the light fixture before changing the batteries. Take the old batteries out by opening the battery compartment. Inspect the contacts for corrosion and clean them if needed. Correctly replace the batteries, paying attention to the polarity labels. Make sure the fixture works properly by closing the battery container and testing it.
13. Testing GFCI Outlets
Maintaining a safe electrical environment requires regular testing of GFCI outlets used for outdoor lighting. During testing, an electrician will turn off the electricity to all of the connected appliances by pushing the “Test” button on the wall outlet. This should trigger the GFCI to trip. Before continuing, the electrician will verify the power is off with a voltage tester, followed by pressing the “Reset” button. The tester should show power; however, there’s a chance the GFCI may not reset. If this happens, the electrician will know how to fix the problem.
Bacon Plumbing Heating Air Electric is here to meet all of your outdoor lighting needs. We also offer HVAC, indoor air quality, plumbing and electrical services of all types. Contact us now to learn more about proper outdoor lighting maintenance in Rockwall, TX.

.jpg.2602271523267.webp)

