Upgrading a Rockwall, TX, home with a programmable thermostat brings about several advantages. For starters, it makes it easy for homeowners to design heating and cooling schedules that match their daily activities. Secondly, by decreasing the need to heat and cool the house when no one is there, an HVAC system will use less energy. Higher HVAC efficiency results in a more comfortable interior atmosphere and lower heating and cooling costs. All of these advantages are contingent upon the thermostat’s proper installation.
1. Check HVAC Compatibility
Before installing a programmable thermostat, a technician must determine whether a specific model is compatible with your current HVAC system. This involves checking the wiring diagram and voltage specifications to ensure functionality. They may also test compatibility with zoning systems or supplementary heating sources.
2. Removal of Old Thermostat
Removing the old thermostat is usually the second step in setting up a new, programmable one. To avoid harming the HVAC system, a skilled technician delicately removes the cables from the old device. After that, they take off the mounting plate and any other parts that aren’t necessary.
3. Installation of New Wiring or Adapters
Some programmable thermostats may require a technician to install new wires or adapters to ensure compatibility with the HVAC system. Adding new wires or adapters allows the thermostat to communicate effectively with the HVAC system, enabling precise temperature control and efficient operation. Technicians assess the system’s wiring and specifications to determine the appropriate modifications needed for a seamless integration.
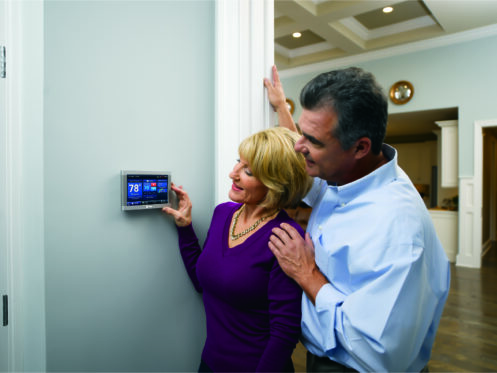
4. Mounting the New Thermostat
When mounting a new programmable thermostat, technicians follow a systematic approach to ensure proper installation. They begin by locating an optimal position on the wall, considering factors like accessibility and proximity to the HVAC system. It’s also important that a location be chosen that is away from windows or doors that may cause drafts.
A level is used to verify the thermostat’s level mounting once they’ve confirmed its placement. After that, they mark the position for drilling holes and securely attach the mounting plate to the wall. Once the plate is in place, technicians connect the thermostat wires to the corresponding terminals. Finally, they attach the thermostat to the mounting plate.
5. Calibration of Temperature Sensors
For programmable thermostats to regulate temperatures accurately, temperature sensors are essential. With the help of these sensors, the thermostat can sense the ambient temperature and change the temperature setting appropriately. Technicians calibrate these sensors after installation to make sure they detect temperatures accurately. They may also check the thermostat’s accuracy using a reference thermometer and adjust it as needed to make it match the room temperature.
6. Verification of Wi-Fi Connectivity
Some programmable thermostats connect to the internet for enhanced functionality and remote control capabilities. Technicians set up and verify WiFi connectivity during installation by accessing the thermostat’s settings and guiding it to connect to the homeowner’s WiFi network. They ensure the connection is stable and test remote access features through a smartphone app or web interface. This enables homeowners to control their thermostat from anywhere with an internet connection, improving convenience and energy efficiency. Additionally, WiFi connectivity allows for firmware updates and integration with smart home systems for seamless automation.
7. Create a Personalized Programming Schedule
During installation, technicians engage with homeowners to create and set up a personalized heating and cooling schedule tailored to their preferences and lifestyle. They discuss the occupants’ daily routines, temperature preferences, and occupancy patterns to optimize comfort and energy efficiency. Technicians input this information into the thermostat’s programming interface, configuring specific temperature settings for different times of the day or week. A customized heating and cooking schedule improves indoor comfort while minimizing energy consumption and utility costs.
8. Explore Features and Functions
Technicians then go over all of the features and functions of the thermostat with the homeowner. They explain all you need to know to control the thermostat, including how to customize its settings and make the most of its advanced functions. At the same time, by experimenting with different modes and settings, experts ensure all functions work as they should. The exact features that your device comes with depend on the manufacturer’s specs. Many newer programmable thermostats come with learning algorithms, geofencing technologies, energy use tracking, voice control, adaptive recovery functions, and more.
9. Guidance on Troubleshooting Common Issues
After confirming the functionality of the thermostat, technicians walk the homeowner through basic troubleshooting procedures. This includes teaching the homeowner how to address inaccurate temperature readings, poor connectivity, and system malfunctions. This proactive approach empowers homeowners to handle minor issues on their own without the inconvenience of having to contact someone else.
10. Discussion on Maintenance and Cleaning Recommendations
After assisting with troubleshooting, the expert will explain the maintenance and cleaning requirements for the programmable thermostat. It’s crucial to regularly clean the sensors to maintain accuracy and performance, as dust and debris can affect them. Technicians may also suggest updating the software and replacing the batteries at regular intervals to keep the device running smoothly. Performing routine maintenance on the thermostat not only makes it last longer, but it also makes it more effective and reliable.
11. Review of Warranty Information
Technicians then take time to explain the warranty details to the homeowner. This step is pivotal for ensuring the homeowner comprehends the manufacturer’s coverage and terms. In the event that the thermostat malfunctions, a clear understanding of the warranty equips the homeowner to take appropriate action. Most programmable thermostats typically come with a warranty ranging from one to five years. These warranties generally cover manufacturing defects and malfunctions, providing repair or replacement of the thermostat within the specified warranty period.
12. Disposal of Old Thermostats
With the new thermostat in place, there’s still one more thing to do: get rid of the old one. The best way to dispose of an old thermostat is to recycle it. Many local recycling centers accept thermostats for proper disposal. Alternatively, some thermostat manufacturers offer recycling programs where you can send back old thermostats for safe disposal. Avoid throwing them in the regular trash to prevent environmental harm and to comply with disposal regulations.
How to Prepare for a Thermostat Installation
An effective and trouble-free installation of a programmable thermostat is possible with proper preparation. Before anything else, homeowners should take note of the specifics of their HVAC system, such as the brand, model, and wiring diagram for the thermostat. With this data, experts can more easily assess compatibility and install software with less effort. Second, make sure the space surrounding the thermostat is clear before installation. This ensures the technician can easily access the area and perform the installation without any hindrance.
Bacon Plumbing Heating Air Electric makes the process of upgrading your thermostat easy. We also help Rockwall homeowners with indoor air quality, water heater installations, water softeners, electrical repairs, and more. Give us a call now to learn more about thermostat installations and what to expect from this process.

.jpg.2602271523267.webp)


